Let me tell you, working with cast iron drain pipes feels like shaking hands with history. For decades – sometimes over a century – these sturdy veterans have silently carried away wastewater in countless homes and buildings. I’ve seen pipes laid before my grandfather was born still doing their job. But here’s the truth they don’t advertise: cast iron demands respect and specific care. Ignore them, and you’ll face the dreaded gurgles, slow drains, and ultimately, backups that smell like trouble. Forget harsh chemical shortcuts; cleaning cast iron properly is an art honed by understanding the beast. I’ve spent years mastering it, and I’m here to share that hard-won knowledge. This isn’t just about unclogging; it’s about preserving a legacy pipe system.
Why Cleaning Cast Iron Pipes Matters
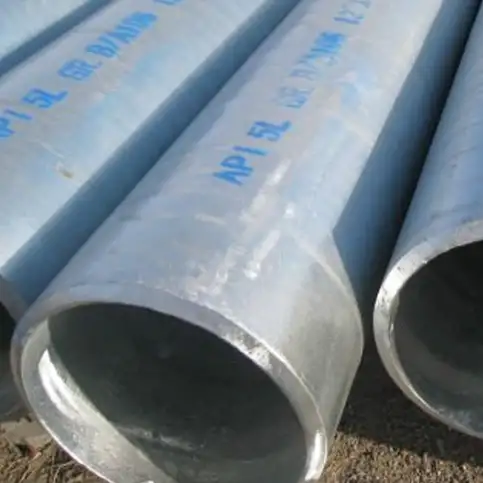
Cast iron pipes have served as plumbing backbones for decades. Their inherent strength means they can tolerate high pressures and resist most chemical attacks. However, over time, rust, mineral deposits, and biological growth can accumulate inside the pipes. These issues lead to:
-
Reduced Flow: Scale buildup narrows the pipe’s inner diameter, slowing water flow.
-
Corrosion: Prolonged moisture and oxygen exposure foster corrosive reactions.
-
Blockages: Accumulated debris or roots can obstruct flow entirely.
I’ve seen homes where low water pressure was blamed on the municipal supply, only to discover cast iron mains riddled with scale. It’s crucial to address these problems early—neglecting them can lead to pipe replacement, extensive digging, and high repair costs.
Understanding Cast Iron Pipe Composition and Vulnerabilities
Cast iron is an iron-carbon alloy containing 2–4% carbon, chromium, and other trace metals. This composition makes it robust, but it’s not impervious. Key vulnerabilities include:
-
Corrosion Under Deposit (CUD): When mineral deposits adhere to the inside, they entrap moisture and create an ideal environment for corrosion.
-
Microbial Induced Corrosion (MIC): Bacteria feed on iron, producing acids that accelerate rust formation.
-
Root Intrusion: Especially in older homes, tree roots seek water and enter tiny cracks, further accelerating deterioration.
I often liken cast iron pipe maintenance to dental hygiene. Just as plaque causes cavities, scale and rust foster pipe decay. Regular cleaning is as essential as brushing your teeth—without it, you risk serious damage.
Overview of Cleaning Methods
There are several approaches to cleaning cast iron pipes. Broadly, you can divide them into:
-
Mechanical Methods (e.g., descaling tools, augers, manual scraping)
-
Chemical Methods (e.g., chelating agents, rust inhibitors, enzyme-based cleaners)
-
Hydro-Jetting (high-pressure water blasting)
-
Professional Coating and Relining (for pipes with severe corrosion)
Below is a comparison table contrasting the most commonly used methods:
| Method | Cost Level | Effectiveness | Risks | Recommended Frequency |
|---|---|---|---|---|
| Manual Scraping / Descaling | Low | Moderate | Potential for pipe damage if mishandled (e.g., gouging) | Every 2–3 years |
| Chemical Cleaning (Chelants) | Moderate | High for mineral deposits | Chemical exposure; improper dilution can harm pipes | Annually or biennially |
| Enzyme-Based Cleaners | Low–Moderate | Moderate–High (organic buildup) | Slower action; may require repeated applications | Quarterly or biannually |
| Hydro-Jetting | High | Very High | Risk of pipe joint damage; requires professional operator | Every 3–5 years |
| Professional Relining/Coating | Very High | Highest (long-term) | Costly; downtime for curing coatings | Once per pipe lifecycle (~20–30 years) |
Step-by-Step Cleaning Guide
1. Preliminary Inspection
I always start with a visual and flow inspection:
-
Assess Water Flow: If water flow feels sluggish, that signals scale or blockage.
-
Check Surrounding Area: Look for damp patches, rust stains, or low spots in the basement.
-
Camera Inspection (Optional): In commercial settings, I occasionally recommend a video camera to pinpoint exact blockages.
Short Sentence Example.
I inspect every joint.
2. Safety Precautions
Working with chemicals and pressurized systems requires strict safety measures:
-
Personal Protective Equipment (PPE): Wear gloves, goggles, and long sleeves to protect from splashes.
-
Ventilate the Area: Chemical off-gassing can be harmful in enclosed spaces.
-
Shut Off Water Supply: Always turn off valves upstream of the section you’ll clean.
-
Drain and Relieve Pressure: Open faucets to relieve trapped pressure and drain standing water.
3. Mechanical Cleaning Techniques
3.1. Manual Scraping and Brushing
-
Tools Needed: Long-handled wire brushes, pipe scrapers, plumber’s auger.
-
Procedure:
-
Insert the wire brush or scraper into the pipe through an access point (clean-out).
-
Rotate and push the tool back and forth to dislodge scale.
-
Withdraw the tool, wipe off debris, and repeat until resistance lessens.
-
-
Pros: Low cost; DIY-friendly.
-
Cons: Labor-intensive; may not reach deep or narrow bends.
3.2. Auger or Drain Snake (“Plumber’s Snake”)
-
Tools Needed: Manual or powered auger with appropriate diameter cable.
-
Procedure:
-
Feed the auger cable into the pipe until you feel resistance.
-
Crank the handle or motor to cut through obstructions.
-
Retract slowly; flush with water to clear remnants.
-
-
Pros: Effective for localized blockages and minor scale.
-
Cons: Less effective on widespread corrosion; risk of scratching inner surface.
4. Chemical Cleaning Approaches
4.1. Chelating Agents (e.g., EDTA-Based Cleaners)
-
Action Mechanism: Chelators bind metal ions (calcium, iron) and dissolve scale.
-
Procedure:
-
Prepare the solution per manufacturer instructions (usually a 1–2% dilution).
-
Pour or pump into the pipe section.
-
Allow dwell time (2–4 hours).
-
Flush with water until pH neutral.
-
-
Pros: High effectiveness on mineral deposits.
-
Cons: Prolonged contact may etch the pipe; disposal considerations.
4.2. Enzyme-Based Cleaners
-
Action Mechanism: Enzymes digest organic matter and slimy biofilm.
-
Procedure:
-
Introduce the cleaner into the system.
-
Let enzymes work overnight or per product instructions.
-
Flush thoroughly.
-
-
Pros: Eco-friendly; safe on pipes.
-
Cons: Slow action; less effective against heavy rust or mineral scale.
5. Hydro-Jetting
Hydro-jetting uses high-pressure water (up to 4,000 psi) to scour pipe interiors.
-
Procedure (Professional):
-
Connect a specialized nozzle to a high-pressure pump.
-
Insert nozzle into the pipe and gradually increase water pressure.
-
Move the nozzle through pipe runs to blast away scale and debris.
-
-
Pros: Thorough cleaning; reaches bends and long runs.
-
Cons: High cost; improper use can damage pipe joints or thin sections.
6. Relining and Coating (When Cleaning Isn’t Enough)
In severely corroded pipes, cleaning may not restore full functionality. Relining involves applying an epoxy or polymer coating inside the pipe to seal corrosion and smooth surfaces.
-
Procedure (Professional):
-
Clean pipe thoroughly (hydro-jetting recommended).
-
Dry interior and apply coating via slip-lining or spin-casting.
-
Cure per manufacturer guidelines (often 12–24 hours).
-
-
Pros: Extends pipe life; reduces future maintenance.
-
Cons: Very expensive; downtime for curing; requires experts.
Comparison Table of DIY vs. Professional Cleaning
| Aspect | DIY Mechanical/Chemical | Professional Hydro-Jetting/Relining |
|---|---|---|
| Initial Cost | Low–Moderate (tools & chemicals) | High (equipment rental, labor) |
| Time Investment | High (manual labor; multiple sessions) | Moderate (1–2 days including setup & cleanup) |
| Effectiveness | Moderate (spot cleaning) | Very High (complete scale removal) |
| Risk to Pipe Integrity | Moderate (human error, over-scraping) | Low if performed by certified technicians |
| Skill Level Required | Basic plumbing knowledge | Specialized training |
| Frequency Recommended | Every 1–3 years | Every 3–5 years |
| Environmental Impact | Dependent on chemicals used | Water consumption high; chemical output minimal |
| Longevity of Results | Short–Medium (3–5 years) | Long (10–20 years with coatings) |
Case Study 1: Residential Home with Frequent Slow Drains
Background: I was called to inspect a 1950s bungalow where the homeowner complained of chronically slow drains. Kitchen sinks backed up regularly, and toilets gurgled after showers.
Assessment: A camera inspection revealed scale buildup along 60% of the main cast iron drain line. Approximate inner diameter reduction was 30%.
Method Chosen: I recommended hydro-jetting instead of DIY scraping because scale spanned multiple bends.
Outcome:
-
Process: Hydro-jetting crew blasted at 3,500 psi. They ran the nozzle from the clean-out in the basement to the street connection.
-
Results: Within an hour, nearly all scale and grease deposits vanished. A follow-up camera inspection confirmed a smooth, clear interior.
-
Benefit: Water flow returned to normal—faucets and showers drained freely. The homeowner avoided a costly pipe replacement.
Lessons Learned
-
Hydro-jetting is superior when scale is extensive.
-
Camera inspection is invaluable for accurate diagnosis.
-
A one-time professional service can outperform multiple DIY attempts.
Case Study 2: Commercial Kitchen Preventative Maintenance
Background: A mid-sized restaurant experienced occasional clogs in multiple sinks. They used grease traps but saw recurring issues.
Assessment: Visual inspection and grease trap records pointed to gradual grease and organic buildup inside cast iron branch lines.
Method Chosen: I chose enzyme-based cleaning quarterly, supplemented by annual light hydro-jetting.
Outcome:
-
Process: Every three months, staff introduced enzyme cleaner to the sinks, allowing overnight action. Each year, we scheduled a hydro-jet to reinforce results.
-
Results: Over 18 months, clog frequency dropped by 90%. The enzyme pretreatment lessened grease accumulation, making annual hydro-jetting faster and cheaper.
-
Benefit: The restaurant saved on emergency plumbing call-outs and maintained uninterrupted operations.
Lessons Learned
-
Preventative maintenance beats reactive repairs.
-
A hybrid approach (enzyme + hydro-jet) extends pipe life and reduces costs.
-
Training staff on proper grease disposal is crucial.
Step-by-Step DIY Cleaning Protocol
If you choose to tackle cleaning yourself, follow this protocol. Note: Always consult a professional if you encounter major blockages or suspect severe corrosion.
-
Gather Materials:
-
Wire brushes and pipe scrapers (long-handled).
-
Plumber’s auger (manual or electric).
-
Enzyme-based cleaner or diluted chelating solution (EDTA-based).
-
Rubber gloves, goggles, protective clothing.
-
Bucket or water source for flushing.
-
-
Shut Off Main Water Supply:
-
Locate the main shutoff valve.
-
Turn off and open nearby faucets to relieve pressure.
-
-
Access the Pipe Interior:
-
Find a clean-out port near foundation or basement.
-
Remove cap carefully (threaded or rodded clean-outs).
-
-
Mechanical Descaling:
-
Insert wire brush or scraper.
-
Rotate vigorously; pull back, wipe off debris.
-
Repeat until resistance eases.
-
-
Auger Blockage Removal:
-
Feed plunger cable until you hit obstruction.
-
Crank auger to break through.
-
Back out cable slowly; retrieve debris.
-
-
Chemical Cleaning:
-
Mix chelating solution per instructions (e.g., 2% EDTA).
-
Pour slowly into the clean-out.
-
Let dwell for at least 3 hours.
-
Flush with warm water until clear.
-
-
Enzyme-Based Maintenance (Optional):
-
For minor organic buildup, pour enzyme cleaner as directed.
-
Let sit overnight.
-
Rinse with water next morning.
-
-
Final Flush and Inspection:
-
Run hot water through fixtures for 5–10 minutes.
-
Check for improved flow.
-
Reinstall clean-out cap securely.
-
-
Document Observations:
-
Note any remaining wet spots or odors.
-
Schedule next maintenance (6–12 months recommended).
-
Safety and Environmental Precautions
-
Chemical Handling: Always dilute chemicals precisely. Concentrated chelators can etch metal.
-
Wastewater Disposal: Avoid letting chelating agents enter storm drains—dispose of flushed water per local regulations.
-
Avoid Mixing Chemicals: Never combine bleach with acid-based cleaners; toxic gases can form.
-
Proper Ventilation: Running chemicals in poorly ventilated basements can cause dizziness and headaches.
-
Use Lockout/Tagout (Commercial): In industrial or restaurant settings, isolate the cleaning area to prevent accidental use.
Maintenance Tips for Cast Iron Pipes
-
Regular Inspections: Every 6–12 months, check for leaks, rust stains, or low flow.
-
Grease Trap Management: In kitchens, keep greases out of drains to minimize buildup.
-
Install Strainers: Use sink strainers to catch hair, food particles, and debris.
-
Schedule Professional Cleaning: Hydro-jet every 3–5 years, depending on usage.
-
Monitor Water Chemistry: Hard water accelerates scale formation; consider a water softener if necessary.
Frequently Asked Questions (FAQs)
1. How often should I clean cast iron pipes in a residential setting?
I recommend inspecting your cast iron pipes annually. If you notice slow drainage or gurgling sounds, consider cleaning at that point rather than waiting for a full year. Generally, minor mechanical cleaning or enzyme-based treatment every 1–2 years suffices. For older systems (over 30 years), hydro-jetting every three years is wise to prevent severe scale buildup and corrosion.
2. Can I use household chemicals like vinegar and baking soda to clean cast iron pipes?
While vinegar and baking soda are popular DIY cleaners, they have limited effectiveness on heavy scale and rust. Vinegar’s acetic acid can break down minor mineral deposits. Baking soda helps neutralize odors. However, for substantial buildup, you’ll still need a stronger chelating agent or hydro-jetting. If you do use vinegar and baking soda, pour one cup of baking soda followed by one cup of vinegar; let it fizz for an hour, then flush with hot water. This method is safe but best suited for maintenance rather than deep cleaning.
3. What are the signs that cast iron pipes need professional hydro-jetting?
Key indicators include:
-
Persistent low water flow across multiple fixtures.
-
Recurring backups despite using a drain snake.
-
Visible rust or leaks at joints.
-
Historical records showing no major cleaning in over 5 years.
If you experience any combination of these, call a professional. Hydro-jetting can restore nearly new pipe diameter and clear roots or heavy scale that DIY methods can’t tackle.
4. Are there any environmental concerns with chemical cleaners used on cast iron pipes?
Yes. Some chelating agents (like EDTA) can bind heavy metals and threaten aquatic ecosystems if discharged untreated. Always rinse thoroughly and dispose of wastewater per local guidelines. Enzyme-based cleaners are more environmentally friendly, as they break down organic matter without harmful byproducts. If you’re concerned, choose a biodegradable enzyme cleaner and avoid harsh acids or bases near sensitive waterways.
5. My basement smells foul after cleaning. What could be wrong?
A foul odor typically arises from:
-
Trapped Debris: Residual food particles or grease stuck in horizontal runs.
-
Dry P-Traps: If a fixture hasn’t been used, the water seal in the P-trap evaporates, allowing sewer gases to enter.
-
Microbial Growth: If chemical cleaners weren’t fully rinsed, they can create a breeding ground for bacteria.
To remedy this, run warm water for several minutes through each fixture, pour enzyme cleaner down floor drains, and ensure P-traps have water. If the smell persists, inspect nearby vent stacks or consider a professional camera inspection to identify hidden blockages or leaks.
Conclusion
Cleaning cast iron pipes can seem daunting, but with the right approach, it’s manageable. I’ve walked you through everything—from understanding pipe vulnerabilities to detailed DIY protocols and professional options. By comparing methods, reviewing real-world case studies, and exploring common questions, you can decide which strategy fits your budget and needs. Remember: prevention is better than cure. Regular maintenance extends pipe life and avoids costly replacements. Keep your system running smoothly by scheduling inspections and combining mechanical, chemical, and professional techniques as needed.
References:
- NSF International – Understanding Types of Plumbing Pipes
- U.S. Environmental Protection Agency (EPA) – Drinking Water Infrastructure and Pipe Corrosion Research
- Wikipedia – Cast Iron Pipe
- OSHA – Personal Protective Equipment (PPE) Guidelines
- USDA NRCS – Biofilms and Microbial-Induced Corrosion (MIC)
