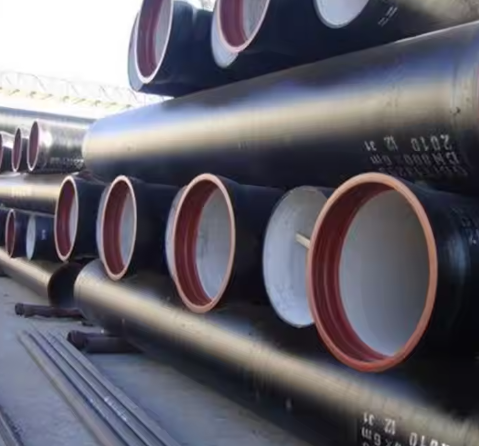
How to repair ductile iron pipe? joint re-tightening and gasket replacement for socket leaks; cement-mortar lining restoration according to AWWA C104 guidelines; mechanical repair sleeves or clamp fittings to seal holes and bell-spigot leaks ; and self-amalgamating silicone tapes or resin bandages for live leaks. Always begin with a thorough risk assessment, trench-stability check, and use of proper PPE—safety glasses, gloves, and respiratory protection—especially when cutting or grinding .

Tools & Materials
-
Mechanical Repair Sleeves & Clamp Fittings: Cast-iron or carbon-steel sleeves that bolt around damaged areas to restore 100 % service capacity .
-
Self-Amalgamating Silicone Tape & HD Bandages: Emergency Wrap & Seal tape and SylWrap HD bandage for live-leak repairs, fusing into a solid rubber seal .
-
Cement Mortar & Sand: One part cement to two parts sand for lining repair per AWWA C104 standards .
-
Replacement Gaskets & Lead Wire: For socket joint repairs—re-packing leaded joints or swapping out rubber rings and O-rings.
-
Hand Tools & PPE: Wrenches, chisels, wire brushes, trowels; plus safety goggles, gloves, hard hats, and respiratory masks for dusty environments .
Safety Precautions
-
Personal Protective Equipment (PPE): Always wear safety glasses, cut-resistant gloves, and a respirator when grinding, sandblasting, or mixing cement.
-
Site Risk Assessment: Perform a job-site evaluation to identify overhead hazards, utility lines, and ensure proper trench shoring to prevent collapse .
-
Lockout/Tagout: Isolate the pipeline and relieve internal pressure before starting any repair work to avoid accidental discharge .
Step-by-Step Repair Methods
1. Joint Leak Repair
-
Relieve Pressure & Drain: Isolate the section and drain down to below the leaking joint.
-
Re-tighten Socket or Lead Pack: For lead-packed joints, re-apply and tamp lead after cooling; for rubber gasket joints, reposition or replace the gasket.
-
Test Under Pressure: Slowly repressurize and inspect the joint for seepage; repeat tightening if needed.
2. Cement-Mortar Lining Restoration
-
Remove Damaged Lining: Cut out spalled or delaminated mortar to clean metal, ensuring edges are perpendicular or slightly undercut.
-
Surface Preparation: Wire-brush, blast, and clean the substrate to promote mortar adhesion.
-
Mortar Application: Mix cement and sand (1:2 volume), wet the area, apply with a trowel, and feather edges to match the existing lining.
-
Seal Coat & Cure: Within 5–30 minutes of lining, apply seal coat and cover with damp burlap for moisture retention during curing.
3. Crack & Hole Repair with Mechanical Clamps
-
Stop-Hole Drilling: Drill small holes at crack ends to prevent propagation.
-
Clamp Selection: Choose a mechanical sleeve sized to pipe OD with appropriate gasket material.
-
Installation: Bolt the split sleeve halves around the damaged section, torque evenly per manufacturer specs.
-
Pressure Test: Repressurize the line and verify no leaks at the repair fitting.
4. Emergency Tape & Bandage Repair
-
Surface Prep: Clean the leak area and remove loose debris or moisture.
-
Apply Wrap & Seal Tape: Stretch and overlap the self-amalgamating tape 50 % over previous layer to build thickness.
-
Reinforce with HD Bandage: Overwrap with resin-impregnated bandage, activating it with water, and allow it to set rock-hard in minutes.
5. Full Section Replacement
-
Cut Out Damaged Section: Use a pipe cutter or saw to remove the faulty pipe, leaving square ends.
-
Install New Spool Piece: Fit with new ductile iron segment, using push-on joints one side and mechanical sleeve on the other.
-
Torque & Test: Tighten all joints per AWWA C111 requirements, then pressure-test to confirm integrity.
Quick-Reference Repair Table
| Damage Type | Repair Technique | Materials |
|---|---|---|
| Leaking Socket Joint | Re-tighten/Replace Gasket | Lead wire or rubber O-ring |
| Spalled Lining | Cement-Mortar Restoration | Cement, sand, seal coat, burlap |
| Crack / Hole | Mechanical Repair Sleeve | Cast-iron sleeve, gaskets, bolts |
| Live Leak | Self-Amalgamating Tape & Bandage | Wrap & Seal tape, SylWrap HD bandage |
| Severely Damaged Section | Full Replacement | New DI pipe spool, push-on or mechanical joints |
FAQ
Q1: Can I repair a ductile iron pipe under pressure?
A1: Emergency wraps like self-amalgamating silicone tape allow live-leak repairs without shutdown, but full mechanical or lining repairs require depressurization.
Q2: How long do clamp repairs last?
A2: High-quality mechanical sleeves restore 100 % service capacity and can last the remaining life of the pipeline (> 50 years) when installed per manufacturer specs .
Q3: When should I opt for full section replacement?
A3: If damage exceeds 25 % of pipe wall thickness, or lining breaches exceed repair-band limits, full spool replacement is recommended.
Q4: Are repair materials NSF-61 certified for potable water?
A4: Use cement, seal coats, and gasket materials that comply with NSF-61 and AWWA C104/C111 standards to ensure drinking-water safety.
References:
- AWWA C104 Standard – Cement-Mortar Lining for Ductile Iron Pipe
- AWWA C111 Standard – Rubber-Gasket Joints for Ductile Iron Pressure Pipe
- OSHA 1926.651 – Excavation Safety and Trench Protection Guidelines
- U.S. EPA – Use of Lead-Free Pipes and Fittings for Potable Water Systems
- Wikipedia – Ductile Iron Pipe: Applications and Repair Methods

