I often get called to tackle cast iron pipe repairs in older homes and commercial buildings. Over the years, I’ve encountered everything from minor leaks to catastrophic failures. In this guide, I’ll share my step-by-step approach for diagnosing issues, executing repairs, and ensuring long-lasting results.
Understanding Cast Iron Pipes
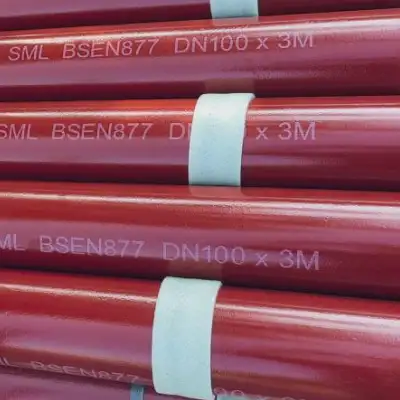
Cast iron pipes have been a fixture in plumbing since the mid-19th century. They’re sturdy, durable, and resistant to many chemicals. Still, age and environmental factors take their toll. I’ve installed and repaired countless cast iron lines. I’ve seen corrosion eat away at walls. I’ve also dealt with bell-and-spigot joints that slowly shift and create leaks.
In older homes, cast iron drain-waste-vent (DWV) systems were standard. Pressure mains sometimes used cast iron too. Today, most new construction favors PVC or ABS, but cast iron remains in tens of millions of existing structures.
Key characteristics:
-
Thickness: Walls can be up to ⅜” thick.
-
Joints: Bell-and-spigot with lead and oakum packing (pre-1950s) or mechanical compression joints (post-1950s).
-
Corrosion: Internal pitting from acidic waste; external rust from soil moisture.
I always remind clients: “Don’t throw in the towel too quickly. Cast iron can often be repaired, not replaced entirely.”
Common Failure Modes
I’ve learned to “read the pipe” like a book. Common failure modes include:
-
Corrosion pits: Small holes that grow over decades.
-
Broken joints: Settling causes separation at the bell.
-
Cracks: Stress fractures from ground movement or freezing.
-
Root intrusion: Tree roots exploiting tiny leaks.
-
Erosion: High-velocity waste scouring the cast iron from inside.
Many times, I arrive on site and see water around the base of a drain stack. That’s a giveaway. Or, if a client complains of slow drainage and foul odor, it might be a severe internal corrosion or root invasion.
Tools and Materials Needed
Short list:
-
Inspection tools: Flashlight, mirror, sewer camera (optional but highly recommended).
-
Cutting tools: Reciprocating saw with cast iron blade, angle grinder (with diamond blade).
-
Measuring tools: Tape measure, level, calipers (for sleeve fits).
-
Sealants/patch materials:
-
Epoxy putty (e.g., plumber’s epoxy).
-
Flexible pipe repair sealant (rubberized).
-
-
Cast iron sleeve kit: Includes rubber gasket, steel bands, bolts.
-
Replacement sections: Hub-and-spigot cast iron or no-hub (with couplings).
-
Safety gear: Gloves, eye protection, dust mask (cutting generates quartz).
-
Lead and oakum (if dealing with vintage leaded joints).
-
Basic plumbing tools: Wrenches, screwdrivers, chisels, cold chisel and hammer (for removing old mortar).
Pro tip: “Measure twice, cut once.” Always size your repair section accurately. A band-aid fix rarely holds up.
Inspection and Diagnosis
1. Visual inspection: I check exposed areas first—basement, utility room, crawl space. Look for rust stains, drips, and soft spots.
2. Functional test: I run water through all fixtures upstream. Then I watch for drips or leaks. Sometimes, I’ll fill a cast iron sink and let it drain to see if air bubbles escape from joints—an early sign of joint failure.
3. Camera inspection: If I suspect issues inside the buried line, I pull out my sewer camera. It helps me find root intrusion and internal collapse. Sometimes cracks are hidden behind a T-fitting.
4. Tap test: I lightly tap the pipe with a screwdriver handle. A hollow or echoing sound means thinning walls; a solid clang means good thickness. It’s like listening to an old barn beam.
After gathering data, I can decide if a patch will suffice or if I need to replace a section. I always aim for the root cause—“get ahead of the game,” as we say on the job.
Repair Methods Overview
5.1 Epoxy and Sealants
-
Best for: Small pinhole leaks or minor corrosion spots (<½” diameter).
-
Pros: Quick, cost-effective—no need to cut pipe.
-
Cons: Temporary if underlying corrosion is extensive.
5.2 Cast Iron Sleeves
-
Best for: Leaks at joints, mid-pipe holes up to 2″.
-
Pros: Durable, mechanically fastened, easy to install in tight spaces.
-
Cons: Requires some pipe cut or exposed section; moderate cost.
5.3 Sectional Replacement
-
Best for: Large holes, multiple leaks, collapsed segments.
-
Pros: Long-term fix; restores full structural integrity.
-
Cons: Labor-intensive; may involve trenching; higher cost.
5.4 Comparison Table
| Repair Method | Typical Leak Size | Durability Estimate | Cost Estimate | Skill Level Required |
|---|---|---|---|---|
| Epoxy/Silicone Sealant | < ½” (small pinhole) | 6–18 months* | Low ($20–50) | Basic – Intermediate |
| Cast Iron Sleeve Kit | Up to 2″ diameter | 5–10 years† | Moderate ($100–250) | Intermediate |
| Sectional Replacement | > 2″ or multiple leaks | Lifetime (original) | High ($500–2000+) | Advanced (plumbing pro) |
-
Durability depends on pipe condition; assume worst-case environmental factors.
† With proper installation and pipe prep.
Step-by-Step Repair Procedures
6.1 Using Epoxy Putty or Sealant
-
Shut off water: For pressure pipes, I isolate the section; for DWV, I block fixtures. Drain the line completely.
-
Clean area: Use a wire brush to remove rust and scale. Wipe dry.
-
Mix epoxy: Knead until uniform in color. Work quickly—some putties set in 3–5 minutes.
-
Apply putty: Press over the leak. Smooth edges to feather out the interface.
-
Cure time: Wait per manufacturer (usually 1–2 hours). Test with water.
-
Monitor: Return in a week to confirm no weeping.
Industry jargon alert: Don’t half-bake the prep. Clean metal = better adhesion.
6.2 Installing a Cast Iron Sleeve
-
Expose the leak: Remove insulation or drywall as needed to access 6–8″ around the hole or joint.
-
Cut back surface: If the pipe has heavy rust or scale, grind the area until you see bare metal.
-
Measure sleeve length: Confirm that the rubber gasket covers the damaged zone completely.
-
Position rubber gasket: Center it over the defect.
-
Place steel bands: Slip on bands per kit instructions.
-
Tighten bolts: Use a torque wrench to manufacturer specs (usually ~20–30 ft-lb).
-
Test: Slowly reintroduce water. Look for drips. Re-tighten if necessary.
I always say: “It’s not rocket science but do it like it is!” Proper torque ensures a watertight seal.
6.3 Full Pipe Section Replacement
-
Plan the cut: Mark two cuts—at least 2″ beyond any visible corrosion.
-
Cut the pipe: Use a reciprocating saw with a cast iron blade or an angle grinder with diamond blade. Wear a dust mask—cast iron dust is hazardous.
-
Remove old section: Chisel out any mortar in the bell. Pull out the section carefully.
-
Inspect adjoining pipe: Check that the remaining pipe ends are square and free of cracks.
-
Prep new section: Dry-fit new hub-and-spigot or no-hub piece. For hub-and-spigot, pack oakum and pour molten lead (if required by code). For no-hub, slide coupling over ends.
-
Align and join: Use pipe supports to maintain grade. Torque no-hub clamps per spec (often 40 ft-lb). For leaded joints, allow cooling and catch drips.
-
Test under pressure: For water lines, pressurize to 1.5× working pressure. For DWV, run water tests.
-
Backfill or patch drywall: If in a wall or floor, restore finishes once plumbing test passes.
Industry idiom: Don’t cut corners—there’s no shortcut to quality. A subpar join today means leaks tomorrow.
Case Studies
7.1 Residential Kitchen Sink Leak
Background: A 1950s bungalow had slow drain and occasional sewer gas smell. The homeowner described “bubbles rising” in the sink. Visual inspection revealed a corroded joint beneath the sink (lead-and-oakum).
-
Diagnosis: I performed a camera inspection. Roots had infiltrated at a joint 5 feet underground, eroding the pipe wall. Upstairs sink drain leaked where the cast iron vertical stack met the horizontal branch.
-
Action: I opted for a cast iron sleeve at the basement joint and a sectional replacement for the buried pipe.
-
Basement joint: Cut out damaged lead and oakum, cleaned the bell, and installed a compression coupling (no-hub) to avoid future lead work.
-
Underground: Dig trench, cut five feet of collapsed pipe, installed a new no-hub section using neoprene gaskets. Backfilled carefully after testing.
-
-
Outcome: Leak stopped immediately. No sewer smell. Homeowner saved about 40% cost versus full repipe.
Lessons learned: Partial fixes work when you nip the root cause. Quick patch = band-aid; proper coupling = confidence.
7.2 Municipal Sewer Lateral Restoration
Background: A city sewer department called me for a failing lateral line serving a row of townhouses. The 1920s cast iron had multiple corrosion holes and root breaches.
-
Diagnosis: Camera and test plugs confirmed four holes, each ~1.5″ in diameter. The joints were loose. Several cast iron sections were thin as a dime.
-
Action: Instead of full excavation—which would disrupt multiple tenants—I used pipe bursting. Work plan:
-
Locate ends: Identify cleanout access points.
-
Bore pits: Two small pits at main sewer stack and street stub-out.
-
Burst and replace: Use hydraulic bursting head to fracture old cast iron while pulling in new HDPE pipe.
-
Reconnect: Tie-in to existing manhole and building stacks with saddle fittings.
-
-
Outcome: No multiple-day road closures. Tenants only had 8 hours without water (bypassed system). Engineers estimated 70% cost savings over open trench.
This project earned me a nod from city inspectors. It illustrated that modern trenchless methods can revive century-old infrastructure.
Preventative Maintenance and Best Practices
-
Regular Inspections: Check exposed cast iron every 2–3 years, especially in humid basements. Look for rust streaks. Listen for unusual sounds.
-
Install Cleanouts: Add cleanouts at strategic points for easy camera access.
-
Control Tree Growth: Roots seek moisture; keep large trees at least 15 feet from lateral lines.
-
Use Chemical Treatments Sparingly: Avoid harsh drain cleaners. They corrode cast iron internally. I recommend enzyme-based cleaners.
-
Insulate in Cold Climates: Freezing can crack cast iron. Install heat tape and insulation in unheated spaces.
-
Upgrade Joints: When you replace sections, consider transitioning to PVC or HDPE with adaptors. It often pays for itself in long-term durability.
Industry idiom: “An ounce of prevention beats a pound of cure.”
Frequently Asked Questions (FAQs)
1. Can I just patch a cast iron pipe with silicone and call it a day?
Silicone sealants can work as a temporary band-aid for very small pinhole leaks. However, they often fail once the underlying metal continues to corrode. I recommend epoxy putty for a more robust patch, but even epoxy only buys time. For leaks larger than ½”, invest in a cast iron sleeve or section replacement for a permanent fix.
2. What are the signs that a cast iron pipe needs full replacement versus a simple patch?
Look for multiple holes, long corrosion runs (more than 2″ length), or wall thickness under ¼”. If you see rust flaking or significant pitting over several inches, a section replacement is the prudent choice. Also, if a camera inspection shows root intrusion or collapsed areas, don’t waste time patching—plan for replacement.
3. How long does a cast iron sleeve repair typically last?
Properly installed sleeves can last 5–10 years or longer. However, the adjacent pipe must be structurally sound. If the metal around the sleeve continues to corrode rapidly, you may see leaks sooner. Inspect the sleeve every 2–3 years for tightness and signs of seepage.
4. Is it worth switching to PVC or HDPE when replacing cast iron?
Absolutely. Modern plastics are lighter, resistant to corrosion, and easier to install. When replacing a section, I often use a transition coupling—cast iron to PVC—and run PVC downstream. It solves future corrosion woes. However, local codes may have guidelines; always check.
5. How can I prevent roots from invading my cast iron sewer lateral?
Install a mechanical root cutter in your schedule—sprinkled with enzyme-based treatments biannually. More important: address leaks quickly. Roots smell water and sewage; a tiny leak is an open invitation. If roots already entered, consider installing a root barrier—high-density polyethylene sheet—during replacement.
