Installing Class 52 ductile iron pipe requires proper handling and joint techniques to meet its high-pressure rating (350 psi). The assembly process involves precise alignment of push-on or mechanical joints, correct gasket placement, and uniform bolt tightening per AWWA C111 standards.
1. Introduction to Class 52 Ductile Iron Pipe
What is Class 52 Ductile Iron Pipe?
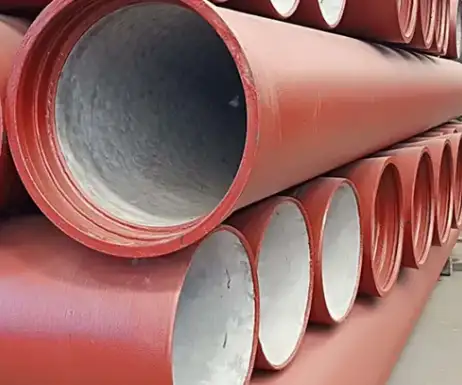
Class 52 ductile iron pipe is a type of cast iron pipe that has been treated to enhance its ductility and strength. This makes it ideal for applications in water distribution systems, wastewater systems, and industrial piping networks. Class 52 pipes are capable of withstanding higher internal pressures compared to other classes of ductile iron pipes, making them particularly useful in areas with heavy traffic loads, aggressive soil conditions, and high-pressure requirements.
Differences between Class 52 and Other Pipe Classes
| Property | Class 52 | Class 50 | Class 56 |
|---|---|---|---|
| Pressure Rating | Higher than Class 50 | Medium | Highest |
| Wall Thickness | 0.39 – 0.43 inches | 0.32 – 0.38 inches | 0.46 – 0.50 inches |
| Typical Applications | High-pressure, heavy-duty use | General water distribution | Extreme pressure systems |
| Weight | Heavy | Moderate | Very Heavy |
Class 52 pipes generally feature a thicker wall and a higher pressure rating, making them more durable under stress. This makes them more suited for use in areas requiring robust infrastructure.
Advantages of Using Class 52 Ductile Iron Pipe
-
High Durability: Class 52 pipes are designed to withstand the most extreme environmental conditions, including high pressures, heavy traffic, and corrosive soils.
-
Longevity: With proper installation and maintenance, Class 52 ductile iron pipes can last for decades, making them a cost-effective solution in the long term.
-
Flexibility: The ductility of these pipes allows them to resist breakage under ground movement, making them ideal for areas prone to seismic activity or shifting soils.
2. Understanding Ductile Iron Pipe Specifications
Material Properties and Manufacturing Process
Ductile iron pipes are made from cast iron that has undergone a special process to enhance its strength and flexibility. The process involves adding small amounts of magnesium to the molten iron, which results in the formation of graphite in the shape of nodules, instead of flakes. This transformation provides the material with enhanced tensile strength, impact resistance, and ductility.
Standards and Certifications for Class 52 Ductile Iron Pipe
-
ASTM A536: This standard covers the specification for ductile iron casting, including the requirements for Class 52 pipes.
-
ANSI/AWWA C151/A21.51: This standard defines the requirements for ductile iron pipe used in water distribution systems.
-
ISO 2531: This is the international standard for ductile iron pipes used in various applications, ensuring consistent quality across manufacturers.
These certifications ensure that Class 52 ductile iron pipes meet the necessary criteria for strength, pressure handling, and longevity.
Key Features and Benefits of Class 52
-
Pressure Handling: The high-pressure rating of Class 52 allows it to perform in demanding environments, even under fluctuating water pressures.
-
Corrosion Resistance: The pipes are often lined with protective coatings to prevent corrosion from chemicals, acids, and other environmental factors.
-
Ease of Installation: The flexible jointing options, including push-on joints and mechanical joints, make the installation process faster and more efficient.
3. Preparing for Installation
Required Tools and Equipment
Before beginning the installation process, ensure you have the necessary tools and equipment:
-
Excavators and trenching machines: For digging the trench where the pipes will be laid.
-
Pipe lifting equipment: Such as cranes or forklifts, to handle the heavy Class 52 pipes.
-
Cutting tools: For cutting pipes to the required length.
-
Gasket and sealing tools: To ensure the joints are properly sealed.
Safety Precautions and Best Practices
Working with heavy materials and large pipes presents safety risks. Always use appropriate personal protective equipment (PPE), including hard hats, gloves, and safety boots. Additionally, always use proper trench safety techniques, such as trench boxes or shoring, to prevent accidents.
Site Assessment and Pipe Handling
-
Inspect the site for any obstacles or underground utilities that might interfere with the trenching process.
-
Handle the pipes carefully to avoid damage. Always store pipes in a dry and secure area away from direct sunlight and other environmental factors that could lead to deterioration.
4. Step-by-Step Guide to Assembling Class 52 Ductile Iron Pipe
Unloading and Storing Pipes
When unloading and storing Class 52 pipes, always use proper lifting techniques to avoid injury and damage to the pipes. Store the pipes on a flat surface and make sure they are protected from any adverse environmental conditions.
Common Issues and Troubleshooting
What is the recommended jointing technique for Class 52 ductile iron pipes?
Jointing techniques for Class 52 pipes depend on the specific project requirements and the types of joints being used. Common methods include:
-
Push-On Joints: Easy to install and cost-effective, but only suitable for certain types of applications.
-
Mechanical Joints: Provide a flexible connection that is ideal for areas prone to soil movement.
-
Flanged Joints: These are used for high-pressure applications and provide a robust connection but are more labor-intensive to install.
Each of these methods has its advantages, and the choice of method will depend on the specific installation environment and pressure requirements.
5. Trenching and Bedding
Planning Trench Dimensions
Proper trenching is one of the most important aspects of a successful pipe installation. The dimensions of the trench will depend on several factors, including the diameter of the Class 52 ductile iron pipe, the type of soil, and the location of the pipe. As a general rule, the trench should be:
-
Width: The trench should be at least 12 inches wider than the diameter of the pipe. This additional space allows for proper alignment and the placement of necessary jointing materials, such as gaskets and seals.
-
Depth: The trench should be deep enough to ensure that the pipe is buried to the required depth, usually 36 inches or more, depending on local regulations and environmental conditions. The depth of the trench also ensures that the pipe is sufficiently protected from external forces, such as traffic loads or freezing temperatures.
Selecting the Right Bedding Material
The bedding material plays a vital role in ensuring the pipe’s stability and preventing damage from external forces. The bedding material should:
-
Provide proper support: Use materials like fine gravel, crushed stone, or sand. These materials create a firm, stable base that can support the weight of the pipe and prevent shifting over time.
-
Allow proper drainage: The bedding material should allow water to drain freely around the pipe, reducing the risk of corrosion and ensuring that the pipe remains structurally sound.
-
Prevent direct contact with rough soil: The bedding material also serves as a cushion to prevent the pipe from coming into direct contact with sharp or abrasive materials in the soil, which could damage the pipe’s exterior.
In some cases, geotextile fabrics may be used to further enhance the stability of the bedding and prevent soil migration into the trench.
Proper Alignment and Grade for Pipe Installation
It is critical to ensure that the pipe is properly aligned and laid at the correct grade to avoid potential issues such as misalignment or improper water flow. Here’s how you can achieve proper alignment and grade:
-
Use string lines or laser levels: These tools help to ensure that the pipe is laid in a straight line and at the correct slope. Maintaining the proper grade is especially important in water distribution systems to facilitate the flow of water under gravity. For gravity sewer systems, the pipe’s grade should generally be a minimum of 1/8 inch per foot to ensure proper flow.
-
Check for deviations: After laying each section of pipe, check for any deviations in alignment or grade. If necessary, adjust the pipe to correct any issues before proceeding with further installation.
6. Pipe Assembly Process
Cleaning and Lubricating Pipe Joints
Before assembling the joints, it is essential to clean the pipe ends to ensure a proper seal. Any dirt, debris, or grease can compromise the integrity of the joint and result in leaks or failure over time.
-
Cleaning: Use a wire brush, scraper, or cleaning cloth to remove dirt and debris from the ends of the pipes. If there are any remnants of old jointing materials or adhesives, these should be removed as well.
-
Lubrication: Apply lubricant to the gasket or jointing surface. For push-on joints, the lubrication is essential to ensure the gasket fits properly and provides a watertight seal. The lubricant should be applied evenly to both the pipe end and the gasket to reduce friction during assembly and ensure a smooth connection.
It is important to follow the manufacturer’s recommendations for the specific lubricant to use, as using the wrong type can affect the quality of the joint and may lead to failure.
Using Gaskets and Seals
Ductile iron pipes typically use rubber gaskets to ensure a secure and leak-free connection between sections. The gaskets are designed to fit snugly in the joint, providing a flexible seal that can accommodate slight movement or shifts in the pipeline.
-
Position the gasket: Carefully insert the gasket into the groove of the pipe’s bell end (the larger, flared end of the pipe). Make sure the gasket is positioned evenly and is not twisted.
-
Check the gasket’s integrity: Before assembly, inspect the gasket for any signs of damage, wear, or deformity. A damaged gasket can compromise the joint and lead to leaks.
Connecting Pipe Sections
When connecting two sections of Class 52 ductile iron pipe, it is crucial to ensure that the pipe ends fit together properly. Follow these steps for a secure connection:
-
Align the pipe ends: Position the two sections of pipe so that their bell and spigot ends are aligned correctly. For push-on joints, this means ensuring the spigot end fits into the bell end without forcing the connection.
-
Insert the spigot into the bell: Slowly slide the spigot end of the pipe into the bell end. Ensure the joint is fully seated and the gasket is not pinched or displaced.
-
Ensure a secure fit: For mechanical or flanged joints, tighten the bolts or fasteners to the recommended torque to secure the joint. Be sure not to overtighten, as this could damage the gasket or pipe.
7. Backfilling and Compaction
Backfilling Procedures and Materials
After the pipes have been installed and the joints have been secured, backfilling can begin. Proper backfilling is critical for maintaining the stability of the pipe and ensuring the long-term success of the installation.
-
Materials: Use clean, granular materials such as sand or fine gravel for the initial backfill around the pipe. This material should be free of sharp objects that could damage the pipe. Avoid using clay or heavy, compacted soils as backfill, as these can exert undue pressure on the pipe.
-
Layering: Backfill in layers, each no thicker than 6 inches. After each layer is placed, use compaction equipment to compact the material to the required density.
-
Compaction: Proper compaction ensures that the pipe is well-supported and will not shift over time. Use vibratory plate compactors or other suitable equipment to ensure that each layer is properly compacted. Start from the bottom of the trench and work your way up to prevent uneven compaction.
Final Grading and Surface Restoration
Once the trench is backfilled and compacted, perform a final grading to restore the surface to its original level. This ensures proper drainage and prevents future erosion or settling that could affect the pipe’s integrity.
-
Grade to match the surrounding terrain: Use grading equipment to ensure the surface matches the surrounding landscape. Be sure to allow for any future settling of the soil.
-
Surface restoration: If the trench was located in a paved area, such as a road or parking lot, restore the pavement by adding the necessary layers of asphalt or concrete. If the trench was located in a grassy area, reseed the area to promote grass growth and prevent soil erosion.
8. Pressure Testing and Leak Detection
Types of Pressure Tests for Ductile Iron Pipes
Once the installation is complete, it’s essential to perform pressure tests to ensure the integrity of the pipeline. Common pressure testing methods include:
-
Hydrostatic Testing: This is the most common method used for pressure testing ductile iron pipes. The test involves filling the pipe with water and applying pressure. The pipe is then monitored for any drop in pressure, which would indicate a leak.
-
Air Testing: In some cases, air testing may be used to check for leaks. However, this method is less common and generally used only for small sections of pipe.
How to Perform Hydrostatic Pressure Tests
To perform a hydrostatic pressure test, follow these steps:
-
Fill the pipe with water: Close all valve openings and fill the pipe with water to remove any air pockets.
-
Apply pressure: Gradually apply the test pressure, which should be at least 1.5 times the normal operating pressure, but not exceed the pipe’s pressure rating.
-
Monitor the pressure: Keep the pipe under pressure for at least 30 minutes while monitoring the pressure gauge for any drops in pressure.
-
Inspect for leaks: Visually inspect all joints and connections for signs of leaks. Any drop in pressure or visible leaks indicates the need for repair.
Common Leak Detection Techniques
In addition to pressure testing, there are several other methods for detecting leaks in ductile iron pipes:
-
Acoustic Leak Detection: Using specialized microphones or sensors, this method involves listening for the sound of escaping water.
-
Tracer Gas Detection: This technique uses a harmless tracer gas, typically hydrogen, to detect leaks. The gas is pumped into the pipe, and sensors outside the pipe detect any escaping gas.
9. Final Inspection and Commissioning
Pre-Commissioning Inspections
Before commissioning the pipeline, conduct a final inspection to ensure that all installation procedures have been followed. This includes checking the alignment, joint integrity, backfilling, and testing results. It is important to ensure that all repairs or adjustments have been made before the pipeline is put into service.
Cleaning and Disinfection Procedures
For potable water systems, cleaning and disinfection are essential to prevent contamination. Follow local health department guidelines for disinfecting the system, usually involving a chlorine solution, and flush the system thoroughly before it is put into service.
Commissioning the Pipe System
Once the system passes the final inspection and testing, the pipeline can be commissioned. This involves bringing the pipeline into service and monitoring it for any early signs of problems.
10. Maintenance of Class 52 Ductile Iron Pipe
Routine Inspection and Monitoring
Even after installation, it is essential to regularly inspect and monitor Class 52 ductile iron pipes for signs of wear, corrosion, or damage. This can include visual inspections, pressure testing, or using advanced technologies such as acoustic sensors for leak detection.
Common Issues and Troubleshooting
How do I prevent corrosion in ductile iron pipes?
Corrosion is one of the most significant threats to the longevity of ductile iron pipes. To prevent corrosion, follow these practices:
-
Protective Coatings: Use a coating system to protect the external surface of the pipe from exposure to moisture, soil, and chemicals.
-
Cathodic Protection: Consider using cathodic protection, which involves applying a small electrical charge to prevent corrosion.
-
Proper Backfilling: Use clean, non-corrosive backfill materials to reduce the chances of corrosive soil coming into contact with the pipe.
-
Regular Inspections: Periodically inspect the pipes, especially in areas with high moisture content or aggressive soil, for signs of corrosion.
References:
ASTM A536 – Standard Specification for Ductile Iron Castings (ASTM International)
ANSI/AWWA C151/A21.51 – Ductile-Iron Pipe, Centrifugally Cast (AWWA Official Site)
ISO 2531:2009 – Ductile iron pipes, fittings, accessories and their joints for water applications (ISO)
Ductile Iron Pipe – Overview, History, and Applications (Wikipedia)
OSHA Trenching and Excavation Safety Guidelines (U.S. Occupational Safety and Health Administration)
