Installing a UniFlange on ductile iron pipe requires precise alignment and proper sealing to ensure a leak-free, high-pressure connection. The process involves preparing the pipe end, positioning the UniFlange’s gasket and backing ring, and applying uniform bolt torque to create a secure mechanical joint.
1. Introduction to Uniflange Installation on Ductile Iron Pipe
The installation of a Uniflange on ductile iron pipe is a critical process in various industrial, municipal, and utility applications. A Uniflange is a type of flange adapter that helps create a reliable connection between a ductile iron pipe and other types of equipment or piping systems. The flange provides an essential mechanical seal to prevent leaks and allows for easy disassembly for maintenance or repair.
This guide will delve into the step-by-step process of installing a Uniflange on a ductile iron pipe, providing insights into the best practices, tools required, and common issues faced during installation. Whether you are a seasoned professional or new to the field, this guide offers expert advice and actionable steps to ensure successful installations.
2. Understanding the Uniflange and Its Purpose
2.1. What is a Uniflange?
A Uniflange is a specialized flange adapter designed to fit ductile iron pipes, enabling seamless connections to different types of valves, pumps, or other pipe components. The Uniflange ensures a secure seal and minimizes the risk of leaks in high-pressure systems.
2.2. Applications of Uniflange
Uniflanges are used in various industries, including:
-
Water and Wastewater Systems: Connecting pipes, valves, and other fittings.
-
Oil and Gas: For secure sealing and flexible connection options.
-
Industrial Applications: Used in factories and manufacturing plants for fluid transport.
2.3. Benefits of Using Uniflanges
-
Easy Installation: Simplifies the process of connecting pipes and valves.
-
Leak Prevention: Ensures a tight seal to prevent leaks.
-
Durability: Long-lasting, made from corrosion-resistant materials.
-
Maintenance Flexibility: Facilitates easier disassembly for repairs or replacements.
3. Key Components of a Uniflange System
To properly install a Uniflange, it is essential to understand its key components. Each part plays a crucial role in ensuring the system functions correctly and securely.
3.1. Uniflange Adapter
The adapter connects the pipe to other components, providing a reliable seal. It typically features a cylindrical design with bolt holes that align with both the pipe flange and the connecting equipment.
3.2. Gasket
A gasket is placed between the Uniflange adapter and the pipe to create a water-tight seal. The type of gasket material used depends on the specific application (e.g., rubber or elastomer for general purposes).
3.3. Bolts and Nuts
The bolts and nuts secure the Uniflange adapter to the ductile iron pipe, ensuring the flange is tightly fastened and leak-proof.
3.4. Locking Mechanism
Some Uniflanges come with locking mechanisms that further secure the connection and prevent loosening due to vibration or pressure fluctuations.
4. Materials and Tools Required for Installation
Before beginning the installation process, ensure that you have the following materials and tools at hand:
4.1. Materials
-
Uniflange Adapter: The correct size for the ductile iron pipe.
-
Gasket: Properly sized to fit between the flange and the pipe.
-
Bolts and Nuts: The correct size and material for securing the flange.
-
Pipe Lubricant: To ease the installation process and ensure smooth movement.
4.2. Tools
-
Wrenches (Torque Wrench, Adjustable Wrench): Used for tightening bolts to the required torque.
-
Pipe Cutter or Saw: For cutting the ductile iron pipe to the correct length.
-
Measuring Tape: To measure the pipe and ensure accurate cuts and installations.
-
Deburring Tool: To smooth out any rough edges on the pipe after cutting.
-
Level: To ensure the flange is properly aligned during installation.
5. Step-by-Step Guide: How to Install a Uniflange on Ductile Iron Pipe
5.1. Preparation
-
Shut Off the Flow: Ensure that the system is depressurized and there is no fluid flow before starting the installation.
-
Inspect the Pipe: Check the ductile iron pipe for any signs of damage or irregularities. Clean the pipe ends to ensure a smooth and even surface for the flange to attach.
-
Measure the Pipe: Use a measuring tape to measure the exact length of pipe needed for the installation.
-
Cut the Pipe (If Necessary): If the pipe is too long, use a pipe cutter or saw to cut the pipe to the required length, ensuring the cut is clean and straight.
5.2. Preparing the Uniflange
-
Inspect the Uniflange Components: Verify that the Uniflange adapter, gasket, bolts, and nuts are all in good condition and compatible with the pipe size.
-
Lubricate the Pipe and Flange: Apply pipe lubricant to the flange and pipe ends to make the installation easier and reduce friction during tightening.
-
Align the Gasket: Place the gasket in the correct position on the Uniflange adapter. Ensure it is seated properly and won’t move during installation.
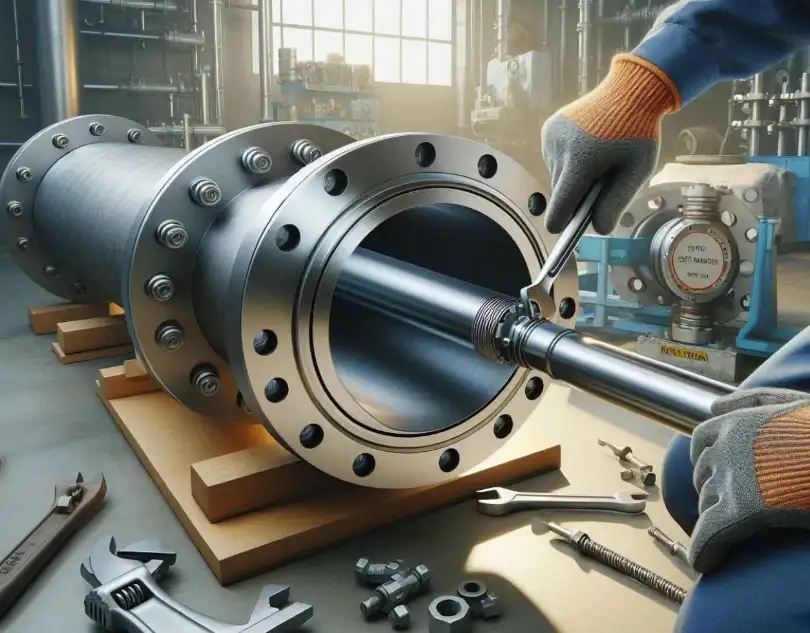
5.3. Installing the Uniflange
-
Position the Uniflange Adapter: Align the Uniflange adapter with the pipe end, ensuring that the bolt holes on the flange match up with those on the pipe.
-
Attach the Bolts: Insert the bolts through the flange holes and hand-tighten them into place. Be careful not to overtighten at this stage.
-
Tighten the Bolts: Using a torque wrench, tighten the bolts in a star pattern, ensuring even pressure is applied across the flange and pipe. Follow the manufacturer’s specifications for the required torque.
5.4. Final Checks
-
Check for Leaks: After installation, check for any visible leaks around the gasket and flange connection.
-
Pressure Test: Perform a pressure test to verify that the Uniflange connection is secure and there are no leaks under operational conditions.
6. Troubleshooting Common Installation Issues
6.1. Misalignment of the Flange and Pipe
If the Uniflange does not align with the pipe properly:
-
Solution: Double-check the measurements and ensure the pipe is cut to the correct length. If necessary, use an alignment tool to adjust the positioning.
6.2. Leaks Around the Gasket
Leaks may occur if the gasket is not properly seated:
-
Solution: Ensure the gasket is correctly positioned and not twisted. If the gasket appears damaged, replace it with a new one.
6.3. Difficulty Tightening the Bolts
If bolts are hard to tighten:
-
Solution: Use an adjustable wrench to gently apply pressure, or apply a small amount of lubricant to the bolt threads to reduce friction.
7. Best Practices for Maintenance and Inspection
Once the Uniflange has been installed, regular maintenance and inspection are crucial for ensuring long-term reliability. Here are some best practices:
7.1. Visual Inspection
Perform routine visual checks for signs of wear, corrosion, or leaks around the flange and gasket.
7.2. Torque Recheck
Periodically check the tightness of the bolts using a torque wrench to ensure they remain at the correct torque settings.
7.3. Gasket Replacement
Gaskets should be replaced if they show signs of wear, cracking, or degradation, especially if the system operates under high pressure.
8. FAQ Section
Q1: What size Uniflange do I need for my ductile iron pipe?
Answer: The size of the Uniflange required depends on the diameter of the ductile iron pipe. Measure the pipe’s outer diameter and consult with the manufacturer’s specifications to select the correct Uniflange size. Ensure that the flange is designed for the specific pipe material and pressure requirements.
Q2: How do I ensure a leak-free connection when installing a Uniflange?
Answer: To ensure a leak-free connection, make sure the gasket is properly seated, the flange is aligned with the pipe, and the bolts are tightened to the manufacturer’s recommended torque. Use pipe lubricant on the flange and pipe to help achieve a tight seal without damaging the components.
Q3: Can I install a Uniflange without a gasket?
Answer: It is not recommended to install a Uniflange without a gasket. The gasket is crucial for creating a water-tight seal between the flange and the pipe. Without it, there is a high risk of leaks and system failure.
Q4: How often should I inspect a Uniflange installation?
Answer: Regular inspection should be carried out at least once a year or after any major maintenance or system modification. Inspect for signs of corrosion, wear, and check for leaks during the inspection process.
Q5: What should I do if the bolts are loose after installation?
Answer: If the bolts are loose, first recheck the torque settings using a torque wrench. If the bolts continue to loosen, consider replacing the bolts with higher-quality fasteners or applying a thread locker for added security.
Q6: How can I avoid misalignment when installing a Uniflange?
Answer: To avoid misalignment, measure the pipe carefully before cutting, ensure the flange is positioned correctly, and use alignment tools to make precise adjustments during the installation process. Taking your time during setup can prevent misalignment issues later on.
9. Conclusion
Installing a Uniflange on a ductile iron pipe is a straightforward yet essential task that ensures long-lasting, reliable piping systems. By following the steps outlined in this guide, using the right tools, and adhering to best practices, you can achieve a secure and leak-free connection. Regular maintenance and inspection are key to keeping the system in good working order. With this detailed guide, professionals can approach the installation process with confidence.
References:
AWWA C111 – American Water Works Association Standard for Mechanical Joint Fittings
Wikipedia – Ductile Iron Pipe: Properties, Applications, and Jointing Methods
ASTM C151 – Standard Specification for Ductile Iron Pipe Fittings
U.S. Nuclear Regulatory Commission – Guidelines for Bolted Mechanical Joints
McWane Ductile – How to Install a Mechanical Joint Fitting on Ductile Iron Pipe
