Installing a flange adapter is a critical step in ensuring the integrity and functionality of piping systems across various industries, including water treatment, HVAC, and industrial applications. This detailed guide provides step-by-step instructions, best practices, and expert insights to assist both professionals and DIY enthusiasts in successfully installing flange adapters.
1. Introduction to Flange Adapters
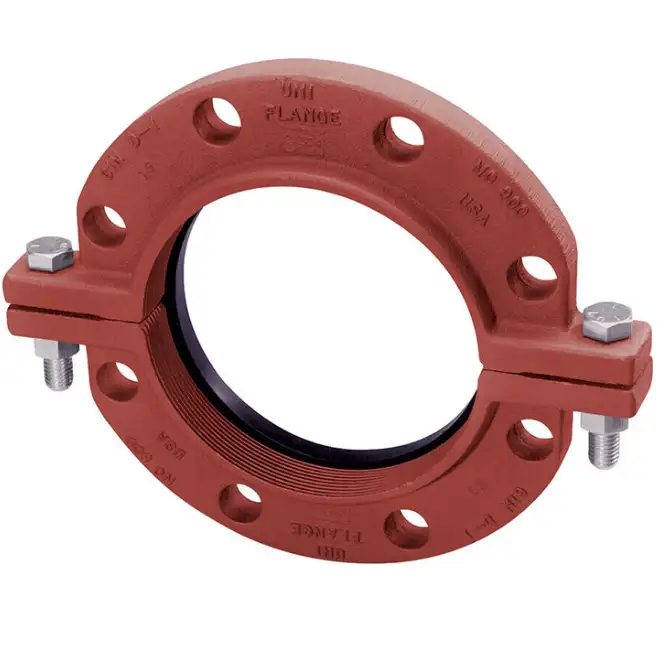
Flange adapters are mechanical components used to connect pipes of different materials or sizes, facilitating a secure and leak-proof joint. They are widely utilized in systems where a transition between various pipe types is necessary, such as connecting PVC pipes to steel flanges or integrating new pipelines into existing infrastructure.
2. Types of Flange Adapters
Understanding the different types of flange adapters is crucial for selecting the appropriate one for your specific application:
-
Mechanical Joint Flange Adapters: Designed for connecting pipes with mechanical joints to flanged systems.
-
Grooved Flange Adapters: Utilize a grooved pipe end to secure the adapter, commonly used in fire protection systems.
-
Threaded Flange Adapters: Feature internal threads to connect with externally threaded pipes.
-
Welded Flange Adapters: Require welding to attach to the pipe, providing a permanent connection.
-
Ductile Iron Flange Adapters: Offer high strength and are suitable for heavy-duty applications.
3. Essential Tools and Materials
Before commencing installation, ensure you have the following tools and materials:
-
Flange Adapter Kit: Includes the adapter body, gaskets, bolts, and nuts.
-
Pipe Lubricant: Facilitates easier assembly and prevents damage to gaskets.
-
Torque Wrench: Ensures bolts are tightened to the manufacturer’s specifications.
-
Cleaning Supplies: Wire brush, cloths, and cleaning agents to prepare pipe surfaces.
-
Measuring Tape: For accurate measurements of pipe dimensions.
-
Safety Gear: Gloves, goggles, and protective clothing.
4. Preparation Before Installation
Proper preparation is key to a successful installation:
-
Inspect Pipe Ends: Ensure they are clean, smooth, and free from defects.
-
Measure Pipe Dimensions: Confirm the outer diameter and wall thickness to select the correct flange adapter size.
-
Clean Pipe Surfaces: Remove any debris, rust, or old sealing materials.
-
Lubricate Components: Apply a thin layer of pipe lubricant to gaskets and pipe ends to ease assembly.
5. Step-by-Step Installation Process
Step 1: Position the Flange Adapter
Align the flange adapter with the pipe end, ensuring that the gasket cavity faces outward. Slide the adapter onto the pipe, making sure it fits snugly without forcing it.
Step 2: Insert the Gasket
Place the gasket into the adapter’s gasket cavity, ensuring it is centered and properly seated. The gasket should be compatible with the pipe material and operating conditions.
Step 3: Attach the Flange
Align the mating flange with the adapter, ensuring bolt holes are properly aligned. Insert bolts through the flange holes and hand-tighten nuts onto them.
Step 4: Tighten Bolts
Using a torque wrench, tighten the bolts in a crisscross pattern to ensure even compression of the gasket. Refer to the manufacturer’s torque specifications for the correct settings.
Step 5: Inspect the Installation
Check for any misalignments, gaps, or signs of stress. Ensure that the flange adapter is securely attached and that the gasket is properly compressed.
6. Torque Specifications and Tightening Procedures
Proper torque application is essential to prevent leaks and ensure the longevity of the connection:
-
Initial Torque: Apply the specified torque value to each bolt in a sequential pattern.
-
Final Torque: After all bolts are tightened, recheck and apply the final torque setting.
-
Re-tightening: After the system has been pressurized, recheck bolt tightness and adjust if necessary.
Always refer to the manufacturer’s guidelines for specific torque values.
7. Sealing Methods and Gasket Selection
Selecting the appropriate gasket is crucial for a leak-proof seal:
-
Material Compatibility: Choose gaskets made from materials compatible with the pipe contents (e.g., EPDM for water, Viton for chemicals).
-
Temperature and Pressure Ratings: Ensure the gasket can withstand the operating temperature and pressure.
-
Gasket Placement: Place the gasket with the correct orientation, as specified by the manufacturer.
8. Common Installation Mistakes and How to Avoid Them
Avoid these common pitfalls to ensure a successful installation:
-
Incorrect Gasket Orientation: Always follow the manufacturer’s instructions regarding gasket placement.
-
Over-tightening Bolts: This can damage the gasket or flange.
-
Using Incompatible Materials: Ensure all components are compatible with each other and the system’s requirements.
-
Neglecting to Inspect Pipe Ends: Dirty or damaged pipe ends can compromise the seal.
9. Maintenance and Inspection Tips
Regular maintenance ensures the longevity and reliability of flange adapters:
-
Regular Inspections: Check for signs of wear, corrosion, or leaks.
-
Cleaning: Keep the flange area clean and free from debris.
-
Re-tightening: Periodically check and re-tighten bolts as necessary.
-
Gasket Replacement: Replace gaskets that show signs of degradation.
10. Frequently Asked Questions (FAQs)
Q1: How do I select the correct flange adapter size?
A1: Measure the outer diameter of the pipe and match it with the flange adapter’s specifications. Ensure the adapter’s pressure and temperature ratings meet your system’s requirements.
Q2: Can I use any gasket with a flange adapter?
A2: No, gaskets must be compatible with both the flange adapter and the pipe material. Refer to the manufacturer’s recommendations for suitable gasket materials.
Q3: What should I do if I notice a leak after installation?
A3: First, ensure all bolts are properly tightened. If the leak persists, inspect the gasket for damage or misalignment. Replace the gasket if necessary and reassemble the connection.
Q4: How often should I inspect flange adapters?
A4: Regular inspections should be conducted at least annually, or more frequently in systems with high pressure or corrosive materials.
Q5: Can I install a flange adapter myself, or should I hire a professional?
A5: With the proper tools and knowledge, flange adapter installation can be a DIY project. However, for complex systems or if you’re unsure, it’s advisable to consult a professional.
Q6: What are the consequences of improper installation?
A6: Improper installation can lead to leaks, system failures, and potential safety hazards. Always follow manufacturer guidelines and best practices.
For a visual demonstration of flange adapter installation, you may find the following video helpful:
