When I first started working in the trenches as a journeyman plumber, I quickly learned that cutting cast iron pipe is no walk in the park. It’s a task that requires precision, the right tools, and a steady hand. In this article, I’ll walk you through everything I’ve picked up over years on job sites—so you can tackle cast iron pipe cuts with confidence and finesse.
Casting a durable material, cast iron has powered plumbing systems for over a century. However, its hardness and brittleness pose challenges. Let me cut to the chase: if you want a clean, reliable cut, you need to know your methods, follow safety precautions, and choose the best tools. By the end of this guide, you’ll have all the know-how to make the right choice for your project—no sweat.
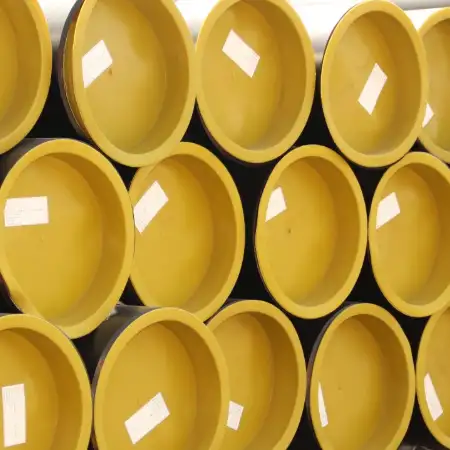
Why Cut Cast Iron Pipe?
Cast iron pipe remains a staple in many existing plumbing and drainage systems—particularly in older homes and commercial buildings. You might need to cut cast iron pipe for:
-
Replacing a Damaged Section. When a pipe cracks or corrodes, a section often must come out.
-
Retrofits or Renovations. Updating old plumbing to modern PVC or ABS requires removing sections of cast iron.
-
Connecting to New Fixtures. Adding a new toilet, sink, or cleanout may require custom-length pieces.
-
Maintenance and Access. Sometimes, tapping into an existing run or installing inspection ports means cutting the pipe.
I’ve seen situations where a quick fix, like clamping a repair band, fails down the road. In those cases, cutting out the bad segment and installing a proper coupling is the way to go—measure twice, cut once, as they say in our line of work.
Essential Safety Precautions
Before grabbing any blade or rotary tool, give a heads-up to your inner safety-conscious self. Cast iron shreds into sharp, jagged fragments. Follow these rules to avoid accidents:
-
Wear Personal Protective Equipment (PPE).
-
Safety goggles or a full-face shield.
-
Heavy-duty work gloves to guard against cuts.
-
Long sleeves and pants to protect exposed skin from flying debris.
-
Hearing protection—cutting cast iron can be loud.
-
Respiratory mask rated for dust and silica—if you’re cutting dry, you’ll create fine dust.
-
-
Secure the Workpiece.
-
Use a sturdy vise or heavy-duty pipe clamp to keep the pipe from shifting.
-
If the workpiece moves during cutting, you risk an uneven cut and possible injury.
-
-
Choose a Well-Ventilated Area.
-
Casting dust and sparks can be hazardous.
-
If working indoors, use an industrial fan or dust extractor.
-
-
Inspect Your Tools.
-
Check blades for cracks or damage.
-
Confirm that power tools are grounded and cords are intact.
-
Always use manufacturer-recommended blades.
-
-
Plan Your Cut Line.
-
Mark the pipe clearly with a permanent marker or chalk.
-
Double-check measurements against your project plans.
-
By keeping a cool head and following these precautions, you’ll beat the clock on potential hazards.
Tools and Materials Needed
Depending on the cutting method you choose, your toolbox may look a bit different. Here’s a rundown of essentials that I often have with me on the job site:
-
Measuring Tape and Chalk/Marker.
-
Pipe Vise or Heavy-Duty Pipe Clamp.
-
Hacksaw with Bi-Metal Blades.
-
Reciprocating Saw (Sawzall) with Carbide Grit Blade.
-
Angle Grinder with Diamond or Abrasive Metal-Cutting Wheel.
-
Dremel or Rotary Cut-Off Tool with Diamond Wheel.
-
Pipe Splitting Tool (No-Cut Splitting Tool).
-
Band Saw (Portable or Stationary).
-
Chisel and Hammer (for scoring).
-
Safety Gear (listed above).
Get your gear squared away before starting. In tight quarters, I’ll often grab my Dremel “on the fly,” but for larger jobs, an angle grinder or reciprocating saw tends to be my go-to—each has its pros and cons.
Methods for Cutting Cast Iron Pipe
Below, I break down the most common methods. Each section details the process, pros, and cons. Choose what works best for your job—whether you’re working in tight quarters or tackling multiple cuts in a row.
4.1 Hacksaw Method
Process:
-
Mark the cut line around the pipe with chalk.
-
Place the pipe securely in the vise.
-
Use a reinforced bi-metal hacksaw blade rated for cutting metal.
-
Begin cutting along the marked line with steady, even strokes.
-
Rotate the pipe ¼ turn every few strokes to keep the cut straight.
Pros:
-
Low cost; no power source needed.
-
Versatile—works in tight spaces.
-
No sparks—ideal for confined areas with combustible materials.
Cons:
-
Labor-intensive and time-consuming.
-
Blade dulls quickly; expect to change blades often.
-
Not ideal for large-diameter pipes.
“Using a hacksaw for a 4-inch diameter pipe? That’s a workout—but in tight quarters, it’s a lifesaver.”
4.2 Reciprocating Saw (Sawzall) Method
Process:
-
Clamp the pipe firmly in a vise.
-
Install a carbide-grit or bi-metal blade designed for cutting cast iron.
-
Align the blade with the marked cut line.
-
Start the saw at a low speed to establish a groove.
-
Increase speed and apply consistent, moderate pressure until the cut is complete.
Pros:
-
Faster than a hacksaw.
-
Blades are relatively inexpensive.
-
Works reasonably well in somewhat tight spaces.
Cons:
-
Produces sparks and noise—use caution indoors.
-
Vibration can cause fatigue over long cuts.
-
Blade wear is significant when cutting hard cast iron.
“I’ve learned that keeping a firm grip and steady pace prevents the blade from wandering off the line—hit the nail on the head, so to speak.”
4.3 Angle Grinder with Diamond Blade
Process:
-
Secure the pipe with a clamp or in a vise.
-
Fit your grinder with a diamond-tipped blade rated for concrete or metal.
-
Wear a full-face shield and dust mask—this method throws the most dust and sparks.
-
Mark the pipe and position the grinder’s guard between you and the sparks.
-
Bring the spinning blade to the marked line and guide it with even pressure until you cut through.
Pros:
-
Fast, precise cuts.
-
Diamond blades last longer than abrasive wheels.
-
Good for large diameter pipes.
Cons:
-
Generates lots of dust and sparks.
-
Requires an electrical outlet or generator.
-
Blades and grinder can be pricey.
“When I need a clean edge on a 6-inch pipe, the angle grinder is my bread and butter.”
4.4 Rotary Cut-Off Tool (Dremel)
Process:
-
Install a diamond cut-off wheel on your Dremel.
-
Clamp the pipe in a vise.
-
Score a shallow groove along the cut line.
-
Increase the cutting depth incrementally until you pass through.
-
Smooth any rough edges with a grinding bit.
Pros:
-
Extremely precise—great for delicate work.
-
Fits into tight, awkward spaces.
-
Minimal vibration, allowing fine control.
Cons:
-
Very slow for larger pipes.
-
Small wheels wear out quickly.
-
Not practical for high-volume jobs.
“When clearance is an issue, the Dremel’s like a surgeon’s scalpel—laser-focused precision.”
4.5 Pipe Splitting Tool (No-Cut Method)
Process:
-
Place the splitting tool’s jaws around the pipe at the desired cut line.
-
Turn the handle to expand the chisel-like cutter into the pipe.
-
Continue turning until the tool pushes through and splits the cast iron.
-
Remove the pipe opposite the tool.
Pros:
-
No sparks, dust, or noisy cutting.
-
Clean, square cuts without specialized blades.
-
Works well on buried or hard-to-access pipes.
Cons:
-
Initial tool cost is higher.
-
Not ideal for extremely thick or heavily corroded pipe.
-
Requires manual force; can be laborious on larger diameters.
“The splitting tool saves my back when I’m working under a slab—no fuss, no muss.”
4.6 Band Saw Method
Process:
-
Position the pipe in a stationary band saw with a metal-cutting blade.
-
Adjust the blade guide to just above the pipe surface.
-
Turn on the saw and feed the pipe slowly into the blade along the marked line.
-
Keep the feed rate consistent for an even cut.
Pros:
-
Produces very straight, smooth cuts.
-
Less blade deflection than portable methods.
-
Great for shop work and repeat cuts.
Cons:
-
Not portable—pipe has to come to the saw.
-
Limited by saw throat for large diameters.
-
Higher initial equipment investment.
“When I’m in the shop cutting multiple segments, the band saw is a game-changer—beats hauling out my grinder every time.”
Comparison Table of Cutting Methods
| Cutting Method | Speed | Precision | Convenience in Tight Spaces | Cost of Equipment | Dust/Sparks Generation | Recommended For |
|---|---|---|---|---|---|---|
| Hacksaw | Slow | Moderate | Excellent | Low | Minimal | Emergency cuts, tight quarters |
| Reciprocating Saw (Sawzall) | Moderate | Good | Good | Moderate | Moderate | Field repairs, moderate volume jobs |
| Angle Grinder with Diamond Blade | Fast | High | Fair | High | High | Large diameter, high-precision cuts |
| Rotary Cut-Off Tool (Dremel) | Very Slow | Very High | Excellent | Low-Moderate | Low-Moderate | Delicate work, very tight spaces |
| Pipe Splitting Tool (No-Cut Method) | Moderate | High | Fair | High (Tool Cost) | None | Buried pipe removal under slabs, clean cuts |
| Band Saw (Stationary/Portable) | Very Fast | Very High | Poor | High | Moderate | Workshop environment, repeat cuts |
Case Studies
6.1 Residential Bathroom Remodel
Background:
In 2023, I was hired to renovate a 1920s-era home in Omaha, Nebraska. The homeowner wanted to replace an old cast iron waste line under the first-floor bathroom with PVC piping. After breaking through the crawlspace, I found a 3-inch cast iron pipe running horizontally—no easy way around it.
Approach:
-
I chose the angle grinder with a diamond blade. The crawlspace was cramped, but I could maneuver the grinder enough to make the cut.
-
I clamped the pipe to a sturdy block of wood to avoid damage to the underlying joists.
-
Using a respirator and face shield, I scored the pipe, then increased pressure until I cut completely through.
-
The homeowner opted for a no-hub coupling to transition to PVC. Clean, square cuts made it easy to install.
Outcome:
-
Total time on cutting: 12 minutes.
-
Worker safety: zero respiratory issues—dust extraction fan did its job.
-
Homeowner testimonial: “You nailed it—clean and quick!”
“In tight quarters, the angle grinder with diamond blade is like finding gold—you get a smooth cut no matter how cramped the space.”
6.2 Municipal Sewer Line Repair
Background:
An aging sewer main in Portland, Oregon, collapsed beneath a city street. The public works department contracted my crew to remove a 10-foot section of 6-inch cast iron pipe. Traffic needed to reopen the road quickly—beat the clock.
Approach:
-
With space under the street minimal and concerns about dust in a confined trench, we selected the pipe splitting tool.
-
We excavated around the pipe and positioned the tool at each planned joint location.
-
As we turned the handle, the cutter bit scored and eventually split the cast iron. No sparks. Minimal noise. Local residents appreciated the lower disturbance.
-
Once split, sections were lifted out by a backhoe, and we installed new ductile iron pipe.
Outcome:
-
Cutting time per joint: about 8 minutes.
-
No complaints from nearby businesses—virtually dust-free.
-
The city inspector praised the efficient, clean removal.
“When you’re under a road in a tight trench, a splitting tool is a godsend—keeps the peace and gets the job done.”
Step-by-Step Cutting Procedure (Common Steps)
Regardless of your chosen method, the core steps stay the same. Follow these to maintain consistency and safety:
-
Measure and Mark:
-
Double-check your measurements from your project drawings—trust but verify.
-
Wrap a piece of chalk or a marking tool around the pipe to draw a 360° line.
-
-
Position and Secure:
-
If possible, remove the pipe segment from its fixed position.
-
Clamp or secure the pipe in a vise or use a heavy-duty pipe clamp. Ensure there’s no wobble.
-
-
Dress Appropriately:
-
Put on your PPE: eye protection, gloves, hearing protection, and dust mask or respirator.
-
Confirm that all bystanders are at a safe distance.
-
-
Perform a Test Cut (Optional but Recommended):
-
For power tools, turn on at low speed and gently touch the blade to the pipe to establish the groove.
-
This helps to prevent blade wander.
-
-
Execute the Cut:
-
Maintain steady pressure—letting the tool do the work rather than forcing it.
-
If using a hacksaw, rotate the pipe periodically to keep the blade aligned.
-
For power tools, avoid overheating the blade by lifting it off the cut intermittently to let it cool.
-
-
Monitor Progress:
-
Watch for sparks or chips that could indicate excessive force or blade damage.
-
Adjust technique if needed—ease up on pressure if the tool is straining.
-
-
Complete the Cut:
-
As you near the end, reduce speed to avoid chipping or fracturing the final edge.
-
If using a splitting tool, continue turning until the pipe splits cleanly.
-
-
Inspect the Edge:
-
Look for any jagged or uneven sections.
-
Smooth with a grinder or file if necessary.
-
-
Clean Up Debris:
-
Sweep away metal shavings and dust.
-
Dispose of cast iron fragments per local regulations.
-
Following these steps keeps the process uniform—no surprises or reworks.
Finishing the Cut and Preparing for Installation
After you’ve made the cut, you’re not quite done. The pipe end needs prep before coupling or joining to a new section:
-
Deburr the Edge.
-
Use a carbide burr bit on a rotary tool or a handheld file.
-
Remove all sharp edges—nobody wants a pipe dream ending with a nasty cut.
-
-
Check for Square.
-
Place a framing square or machinist’s square against the cut face.
-
If the cut is slightly off, a flap disc on an angle grinder can even it out.
-
-
Apply Primer or Rust Inhibitor (Optional).
-
Exposed cast iron can rust quickly. A zinc-rich primer or cold galvanizing spray helps extend service life.
-
-
Dry-Fit a Coupling.
-
Slide your no-hub or Fernco coupling onto the pipe.
-
Ensure it slides smoothly and sits flush against the cut end.
-
-
Finalize Installation.
-
Tighten coupling clamps to manufacturer specs—usually around 70–80 ft-lbs.
-
Reconnect to adjoining pipe—PVC, ABS, or ductile iron as dictated by the job.
-
“A square cut ensures a snug fit—no leaks or surprises down the line.”
Maintenance Tips and Best Practices
Once you’ve replaced or repaired that cast iron pipe, set the stage for long-term success:
-
Inspect Joints Periodically.
-
Look for signs of corrosion, leaks, or shifting.
-
A quick visual check yearly can save major headaches.
-
-
Avoid Over-Tightening Clamps.
-
Too much torque can dent the pipe, leading to premature failure.
-
Follow manufacturer guidelines—don’t go on a torque tear.
-
-
Use Proper Gasket Lubricants.
-
A bit of pipe dope or silicone lubricant helps achieve a leak-free seal.
-
Always use materials approved for potable water if on a water line.
-
-
Keep Records.
-
Note the date and method of your cut and installation in your maintenance log.
-
This “paper trail” helps future techs know what to expect.
-
-
Train Your Team.
-
If you’re supervising apprentices, walk them through every step—no secrets.
-
Emphasize safety and proper tool selection—cutting corners only leads to rework.
-
Frequently Asked Questions (FAQs)
1. What’s the fastest way to cut a 4-inch cast iron pipe in a basement?
Answer:
In a basement setting with enough clearance, I usually reach for an angle grinder fitted with a diamond blade. It’s a high-speed method that yields a clean cut. Before starting, I secure the pipe in a vise or with pipe clamps—stability is key. Then I score the pipe along my marked line at low speed and ramp up to full RPM, applying gentle, consistent pressure. If dust is a concern, I’ll use a wet/dry vacuum or a dust shroud to minimize airborne particles. All told, I can make a cut in under two minutes. Make sure to wear hearing protection and a face shield—safety first.
2. Can I use a reciprocating saw to cut cast iron pipe without dust control?
Answer:
Technically, yes, but I strongly advise against dry cutting in enclosed spaces. A reciprocating saw (Sawzall) with a carbide-grit blade generates fine cast iron dust that can irritate your lungs and settle on surfaces. If you can, position a small wet/dry vacuum near the cut line or opt for wet cutting methods like an angle grinder with a water-fed diamond blade. If a vacuum isn’t available, at least wear a respirator rated for silica dust. Remember: a clean job site minimizes future headaches.
3. How do I choose between a pipe splitting tool and a power saw?
Answer:
It comes down to the environment and project scale. For jobs under a roadway, in trenches, or in confined crawlspaces—where sparks and noise must be minimized—the splitting tool reigns supreme. It costs more upfront, but you avoid dust and spark hazards. On open jobs or in a shop, a power saw (angle grinder or band saw) is faster and more economical if you have multiple cuts to make. In short, if you’re in the trenches and need to keep peace with neighbors, split it. If you’re in the shop and need speed, saw it.
4. What blade or wheel type lasts longest when cutting cast iron?
Answer:
For power tools, a diamond-tipped blade outlasts abrasive metal-cutting wheels by a wide margin. While diamond blades are pricier—typically $50–$80 each—they stay sharp through dozens of cuts. If you’re buying multiple wheels, the long-term savings quickly offset the initial cost. For reciprocating saws, carbide-grit blades provide solid durability, but expect to replace them every few cuts on thick pipe. Pro tip: store spare blades in a dry place—moisture can corrode the blade packaging and shorten lifespan.
5. How do I ensure a leak-free connection after cutting cast iron pipe?
Answer:
First, deburr and square the cut end—no exceptions. Any ragged edge creates a poor mating surface. Next, choose a high-quality coupling (no-hub, Fernco, or a stainless steel repair clamp). Before sliding the coupling on, wipe the pipe clean of dust and apply a thin coat of approved sealant or silicone lubricant to the rubber gasket. Tighten clamps to manufacturer torque specifications—usually around 70–80 ft-lbs—but don’t go on a torque tear; over-tightening can distort the gasket. Finally, test the assembly by running water or air at working pressure to confirm no leaks. Constant vigilance now prevents costly callbacks later.
Conclusion
Cutting cast iron pipe can feel like a daunting chore—especially when you’re elbow-deep in a renovation or racing against a city’s road closure deadline. But with the right approach, tools, and safety mindset, it’s well within your wheelhouse. I’ve shared my go-to methods: from the sweat-inducing hacksaw to the no-nonsense pipe splitting tool. Whichever path you choose, follow the steps carefully, wear your PPE, and keep your eye on a square, burr-free cut.
Remember that casting dust is no joke—stay safe, stay sharp, and always plan ahead. In my decades on the job, I’ve seen what can happen when shortcuts are taken. So don’t cut corners—cut cast iron the right way.
