In my experience as a plumbing professional with over a decade of hands‑on work, connecting ABS to cast iron piping represents a pivotal skill. Proper transitions ensure system integrity and long‑term performance. Moreover, understanding the material properties and code requirements is crucial.
1. Understanding ABS and Cast Iron Pipes
1.1 Material Characteristics
I’ve worked extensively with ABS (Acrylonitrile Butadiene Styrene) plastic piping in residential drain‑waste‑vent (DWV) systems. ABS offers lightweight handling, chemical resistance, and ease of installation. Cast iron, on the other hand, provides durability, noise dampening, and fire resistance. However, its weight and rigidity pose challenges when joining to flexible ABS.
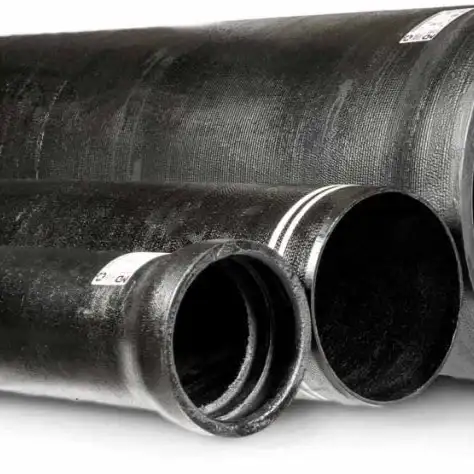
ABS pipe is typically black. Cast iron is grey and much heavier. ABS can flex slightly; cast iron cannot. These differences mean you need specialized couplings.
1.2 Code and Standard Requirements
According to the International Residential Code (IRC) and ASTM standards, any transition between dissimilar materials must employ an approved coupling. I always refer to IRC Section P3014, which mandates listed transition couplings for plastic to cast iron connections. Additionally, ASTM F2261 covers performance requirements for these couplings. Therefore, ensuring your materials are code‑listed avoids costly re‑inspections and callbacks.
2. Tools and Materials Needed
Before starting, gather all the necessary tools and fittings. A “no‑hub coupling” and “fernco” flexible coupling are industry idioms you’ll often hear. Here’s my recommended list:
-
No‑Hub Coupling (stainless steel band, neoprene gasket)
-
ABS Pipe Cutters or reciprocating saw with a fine‑tooth blade
-
Cast Iron Pipe Cutter (for hub removal if needed)
-
Coupling Protector Sleeve (to prevent gasket intrusion)
-
Measuring Tape and marker
-
Pipe Deburring Tool
-
Lubricant approved for neoprene gaskets
-
Safety Gear: gloves, eye protection, dust mask
Short list. Clear tasks ahead. Proper prep saves rework.
3. Step‑by‑Step Connection Process
I’ve distilled the typical workflow into six concise steps. Follow along carefully.
-
Measure and Mark
-
Measure the depth of your coupling (usually ~2 inches).
-
Mark both ABS and cast iron pipes clearly.
-
-
Cut the Pipes
-
Use ABS cutters for plastic; ensure a square cut.
-
For cast iron, wheel‑type cutter or abrasive blade works.
-
Deburr and smooth edges immediately after cutting.
-
-
Dry‑Fit the Coupling
-
Slide the neoprene gasket and bands onto the cast iron stub.
-
Align the ABS pipe to the cast iron.
-
Check for full engagement to your marks.
-
-
Lubricate the Gasket
-
Apply manufacturer‑approved lubricant sparingly.
-
This eases pipe insertion and reduces risk of gasket damage.
-
-
Assemble and Tighten
-
Position the gasket centered over the joint.
-
Hand‑tighten the coupling’s worm‑drive clamps.
-
Use a torque wrench if specified; typically 25–35 ft‑lb.
-
-
Inspect and Test
-
Visually inspect for uniform gasket compression.
-
Perform a water test per code: 10‑ft head for 15 minutes.
-
Address any leaks immediately.
-
Each step flows logically. Minor variations occur depending on brand, but the core method stays the same.
4. Comparison Table: Coupling Options
Below is a side‑by‑side comparison of popular coupling types I’ve used on the job:
| Feature | No‑Hub Coupling | Fernco Flexible Coupling | Compression Coupling |
|---|---|---|---|
| Material | Stainless steel & neoprene | PVC & EPDM rubber | Brass & EPDM rubber |
| Temperature Range | –40°F to 212°F | –20°F to 180°F | –40°F to 250°F |
| Code Compliance | ASTM A888, F1545 | ASTM C1277 | ASTM F2098 |
| Installation Ease | Moderate | Easy | Moderate |
| Cost per Joint (USD) | $15–25 | $8–15 | $20–30 |
| Ideal Application | DWV systems, high‑noise | Tight spaces, DIY | High‑pressure lines |
I refer to this table routinely when specifying material in project plans.
5. Case Study: Residential Kitchen Retrofit
5.1 Project Background
Last year, I was contracted to retrofit a 1920s bungalow kitchen. The homeowner wanted replacing the old cast iron waste lines with modern ABS but retained the main soil stack.
5.2 Challenges and Solutions
-
Limited Access: The stack was behind finished walls.
-
Weight Constraints: Cast iron segments weighed over 30 lbs each.
-
Code Enforcement: Local inspector required an approved coupling per IRC.
I removed a 12‑in section of cast iron using a wheel cutter. Then, I dry‑fit a no‑hub coupling with a protector sleeve to stop gasket blow‑out. Post‑installation, I conducted a 10‑ft water test; zero leaks. The inspector signed off immediately.
5.3 Outcome
The homeowner reported no issues after six months. They praised the minimal noise and reliable seal. This case reinforced the necessity of proper coupling selection and torque control.
6. Best Practices and Code Compliance
6.1 Torque Settings and Gasket Care
Over‑tightening clamp bands can cut into neoprene, causing leaks. Under‑tightening, however, risks blow‑outs. I always use a torque wrench set to the manufacturer’s specified range, typically 25–35 ft‑lb. Consistency here prevents callbacks.
6.2 Thermal Expansion Considerations
ABS expands more than cast iron. In long runs, include expansion loops or use slip‑joint fittings to absorb movement. Otherwise, stresses can deform joints, leading to leaks.
6.3 Firestopping and Sound Rating
Cast iron inherently reduces sound transmission. When penetrating fire‑rated floors, use intumescent wrap around the coupling to maintain the fire rating. Check NPC 713.2 for specifics.
7. Troubleshooting Common Issues
-
Leak at Gasket Edge: Check for cuts in the neoprene and re‑lubricate before re‑clamping.
-
Misalignment: Use a repair flange to correct slight offsets up to 1/4″.
-
Corrosion Under Clamps: Inspect periodically; replace stainless bands if rust appears.
Short bursts of maintenance prevent major failures.
8. Frequently Asked Questions
Q1: Can I use a regular PVC coupling to connect ABS to cast iron?
A1: No. According to IRC Section P3014, only listed transition couplings designed for dissimilar materials are permitted. Regular PVC couplings lack the gasket composition and band strength required for cast iron’s rigidity. Always use a no‑hub or flexible ABS‑to‑CI coupling.
Q2: How do I determine the correct clamp torque?
A2: Manufacturer documentation will specify a torque range, typically 25–35 ft‑lb for no‑hub couplings. If the spec is unavailable, default to 30 ft‑lb. Using a calibrated torque wrench ensures you neither under‑ nor over‑tighten.
Q3: What’s the lifespan of an ABS‑to‑CI coupling?
A3: High‑quality couplings, when properly installed, last 25–30 years. Neoprene gaskets may harden over decades, so plan inspections every 15 years. Environmental factors like UV exposure (if above ground) can accelerate aging.
Q4: Can I reuse a coupling after disassembly?
A4: Generally, no. Gaskets compress and lose elasticity after initial installation. Always replace the gasket and stainless steel bands when re‑connecting to guarantee a leak‑free seal.
Q5: Is primer and solvent cement required for ABS pipe at this joint?
A5: No. The coupling provides the seal. Primer and cement apply only to ABS‐to‐ABS or ABS‐to‐PVC joints. Do not use solvent cement on cast iron, as it offers no benefit and can cause gasket slip.
